Pages

menu home about me contact nail designs buttons Image Map
Showing posts with label nails. Show all posts

December 24, 2013

Easy Holiday Manicure

Easy Holiday/ Christmas Manicure
Easy Holiday Manicure

Hello ladies. Guess who is getting back to posting more regularly? Meeee ( at least I hope and plan so). Today for you I have a very cute, easy and at the same time fast manicure idea for holidays. You need a red and white nail polish or as in my case white acrylic paint because it's much easier to work with plus it drys really fast. If you wonder where you can buy, you should look at your local craft store or on ebay, on ebay acrylic paint for nails is extremely cheaper. Also you will need nail art tape or you can cut scotch tape into 4 very thin pieces and a dotting tool or toothpick.

To start apply your favorite red nail polish and let it dry completely. I chose a simple slightly dark red( I know that in pictures it looks very bright but trust me it's not that bright).
Next step is to place the tape pieces to create this flower/snowflake. Place one vertically, one horizontally and 2 diagonally on each side of the vertical on (hope it makes sense). Now take you white paint and make two lines, forming a triangle tip between tapes and the fill in the rest of the space. If you are confused, I made this picture and hopefully it will help you understand how to do it. Let the paint to dry a bit and then remove the tapes. To complete the design do medium or small white dots on the tips of the rest of nails as well as on the ring finger. And of course the last step is to apply your top coat.

I hope you like the design and don't forget to let me know in the comments what you think of this design. Also I would like to wish Happy Holidays and Merry Christmas to all of you who celebrate. Oh and stay tuned on my blog as I have many reviews coming up in the next 2 weeks.

March 31, 2013

One Stroke Flower with Chains Nail Design

One Stroke Flower with Chains Nail Design
Hey girls, hope you are having a wonderful weekend and Happy Easter to those of you who celebrate it today. Today I will show the nail design I've been rocking this week. It's a really cute and girly design; I don't know about you but I love it.
It's not a hard design to recreate and you can choose any color you want for the tips but I think that baby pink looks nice. You can even do it without the one stroke flower petals and it will still look cute.
As always I have a video tutorial for you in case you want to see how to achieve it step by step. Also if you recreate this or any of my designs I would love to see a picture of your creation, you can easily tweet it to me @AnneColt. To see the tutorial click here and don't forget to subscribe to my channel if you liked the video :)
Photos
.......................................................................................................................................................................................................................................................................
Pink One Stroke Flower with Chains Nail Design


Pink One Stroke Flower with Chains Nail Design


Pink One Stroke Flower with Chains Nail Design


What do you think of this nail design? Let me know in the comments below!
......................................................................................................................................................................................................................................................................

November 7, 2012

How To: Interlocking Dots Nail Art

Good morning everyone. I don't know about you but I love the interlocking dots design on nails,specially on short nails it looks amazing. So I thought I would do a tutorial on how to achieve it because it might be a little bit confusing when you will try to do it just by looking at a picture. For me it is one of the easiest nail designs you can do and you can make it pop by using nail polishes with vivid color difference or make it more discrete by using kinda similar colors. Because I wanted the design to pop I used white and coppery nail polishes and here is the final result:
interlocking dots nail design

interlocking dots design
I don't know about you but I really like it! I would say that interlocking dots design looks better on short nails than on long but hey, if you have long nails go ahead and try and see if you like it :D. 

If you want to see how to do this then click here to watch my YouTube video and maybe you will subscribe later! :)
What do you think of this design? Do you like the interlocking dots designs? Let me know in the comments below.

September 28, 2012

Black and White Nail Art Tutorial

Hello,hello everyone. It's Friday and I hope everyone had a good week and will have even better weekend. Today's post will be a nail art tutorial. It is very simple and elegant design,imo, and not difficult at all to be recreated. Here are some pictures:
Black and White Nail Art

Black and White Nail Art

Black and White Nail Art
This will work on both short and long nails, for short instead of doing the design on side of the nail do it on the half of the nail. And here is the video tutorial so you can recreate this if you want:

What do you think of this nail design?Do you like it? Let me know in the comments below.
If you will recreate this feel free to tweet me @AnneColt your picture, I would love to see your work :)

September 14, 2012

NOTD: Corset Nails

Hello hello everyone. It's Friday already,hope you all will have a great weekend, any exciting plans? As you can understand from the post title today's post is about nails. At first I was thinking of making a youtube video tutorial for this but since it is very similar to another design on youtube that I have seen in the past I decided to just do a blog post. Here is the nail design:
Corset Nail DesignCorset Nail Design

On the thumb,middle and pinky fingers all I did is a simple french manicure with pink base and black tip. On the other two fingers I created kinda corset design and it's very simple to create,here a tutorial:

- First apply your base color,in my case pink.
- With black stripper nail polish create 5 lines, or more if you want, along the nail.
- Now with black create a french tip, just place the brush on one side of the nail, keep it steady and roll you finger.
- With the same stripper nail polish create few half circles between the lines you did before.
- Using dotting tool or toothpick add few small pink dots along the french tip line.
- Lastly create a white bow on one side of the nail. To do so just make two triangles facing each other with the pointy end.
- Apply your top coat and you are done.
- Enjoy!

What do you think of this nail design?Let me know in the comments below.
Also if you will recreate this feel free to tweet me @AnneColt the picture of your work :)

September 9, 2012

NOTD : Love birds

Hello my lovely readers. I can't believe how fast this weekend passed, I guess it's true that when you are having great time the time passes faster. So the past few days I was kinda lazy and instead of coming up with my own design I thought I would recreate one that I wanted to try for a while. I have seen the Love Birds by Robin Moses on youtube a while ago and finally decided to create it. I made small changes so here is mine result:
Autumn nail design, Love birds

Autumn nail design, Love birds

Autumn nail design, Love birds

I thought this design is not only cute but also perfect for fall. On the picture the the colors on index and middle fingers look the same but in real the are 3 different colors: red, pinkish orange and orange. I really love this design and it's so adorable because of the two birds :)
What do you think? Do you like it? Let me know in the comments below

August 3, 2012

NOTD: Color Block Nails

Hello my lovely readers, happy Friday and hope everyone will have a great weekend. Today's post is NOTD. I really rarely change my nails within a week, I usually keep my manicure for about a week. I haven't done the color block style nails so I decided to do it this time. Here's what I came up with.


I did want something toned down so I chose a nude polish with 2 different pink colors. To make it more playful I altered the order of the pink colors as you can see on the picture. It super easy to create, here is the
tutorial:

  • First apply your base coat and let it dry.
  • Take a nude color of your choice and apply it as your background color.
  • After the background color is completely dry take 2 pieces of decorative tape and form an X on half of your nail. If you don't have decorative tape just cut two slim pieces of scotch tape.
  • Now take the first nail polish and fill the triangle that is at edge of your nail.
  • With your other nail polish fill the other 2 triangles, be careful to do not go other the triangle at edge of the nail.
  • Let the nail polishes dry for about 5 mins, or less if the nail polishes dry fast, and then peel off the 2 pieces of tape.
  • Apply your top coat and you're DONE.
  • Enjoy :)
Do you like it?
If you will recreate this feel free to tweet me @AnneColt your picture, I would love to see your work.

July 3, 2012

NOTW-Fun Summer Nails

This is gonna be a really great week as tomorrow is my last exam,finally, and on July 5th is my birthday.
I can't believe that I will be 20 years old,the time passes really quick.
So this week I decided to recreate a nail design I saw on youtube from LOVE4NAILS.
I was thinking of creating something mine but then saw her video and felt in love with the design so here it is.

It's a fun design,perfect for summer and not hard to recreate.
Here's her video


Do you like it? Do you know LOVE4NAILS?


June 28, 2012

Bridal Nails Tutorial

Since I did a french manicure few days ago I decied to add some decorations to that and ended up with this manicure which is great for every occasion especially for wedding day,it's a nice touch to make the bride even more beautiful.

So let's look at the tutorial


Do you like it?
If you will recreate this please tweet me your pictures @AnneColt,I would love to see yours :)


June 20, 2012

Chanel Nail Design

I was thinking for a while to come up with a design inspired by Chanel.The other day,totally at random, one design popped in my mind so I decided to film a tutorial for it.Here is my Chanel inspired nail art design.

And here is the tutorial 

Do you like it? If you will recreate this please feel free to tweet me your picture @AnneColt


June 18, 2012

OPI Nail Envy Matte Review

OPI Nail Envy Matte Review

Few months ago I decided to do acrylic on few of my own nails to make them stronger as they were about to brake and I didn't want to cut them down ,stupid idea. As you can imagine it was very hard to get my nails back to their healthy state. I have heard in the past good things about OPI nails envy so I decided to give it a try. The reason why I opted out for the matte version is that I've read few reviews that stated that the original nails envy stained their nails. So now let's move on to the review...

When I first tried it I wasn't really excited with the result, though back then I didn't used it for more than a week and a half  so my opinion wasn't 100% accurate. When I stopped using OPI nail envy I was using a strengthener from a Greek brand Erre Due hard attack and I was quite pleased with it. Few weeks ago that I ran out of the Erre Due I went back to the OPI one. So now I've been using OPI Nail Envy for good 3 weeks and I must admit I did changed my first opinion about it. It does strengthen your nails on a good level although it doesn't help that much wth splitting, at least for me it doesn't .
So overall as nail strengthener I would give it a 4/5

I must say that I really love it as base. It smooths the nail which helps with a better nail polish application and it also does protect your nails and help to prevent staining
Overall as base coat I give 4.5/5

Now as a mattefying top coat. I wouldn't say that it gives a completely matte finish to the polish but it gives rather natural matte finish . By natural matte I mean that it isn't glossy looking but has a light sheen. 
Overall as mattefying top coat 3.5/5


Overall rating: 4/5
Would I buy it again?:  I would if I could find it at a good prices as here it retails at around 20+ euros
Have you tried it? What's your opinion? Do you have any good nail strengtheners to suggest?
......................................................................................................................................................................................................................................................................
Photobucket
FacebookTwitterRSSHelloCottonPinterestbloglovingoogleplus

June 5, 2012

Prom Nails Tutorial

So this week this is the design I came up with so in other words this is my NOTW.
I thought I would film it and upload it to youtube as it's very cute and easy design .The reason the title says "Prom nails" is because this design is not only perfect for this occasion but also it's super easy to customize it so it maches your dress . Honestly  ,for me , this design can be worn in any occasions like wedding,party,night out,everyday etc as it's,like I said, super easy to customize .

How to:


May 27, 2012

NOTW

Sunday today and I decided to post my manicure for this week so here it is

For this week I decided to go with something easy to create yet pretty to wear.

How to
  • Apply your base coat and then 2 coats of yellow polish.You can choose from pastel yellow to neon yellow,whatever you like.In fact if I had neon yellow I would probably use it for this :)
  • Using black polish or acrylic paint with dotting tool or toothpick create around 5 rows of dots
  • Create bigger dots as you go down on your nail
  • Apply to coat
  • Enjoy :)
Hope everyone will have a wonderful week

May 20, 2012

Angry Birds Space nail design tutorial

I think that pretty much everyone knows Angry Birds and probably have played it at least once.
I'm a huge fan of this game and have spent quite enough time playing it :P
They're newest release was the Angry Birds Space and that's when I decided to create 
manicure inspired by it 
This is what I came up with :)


Here's the insparation picture:

So what do think?You like it?Love it? or hate it?

To see how I achieved this manicure check out my video :)

~Anne~

May 13, 2012

NOTW and Tutorial

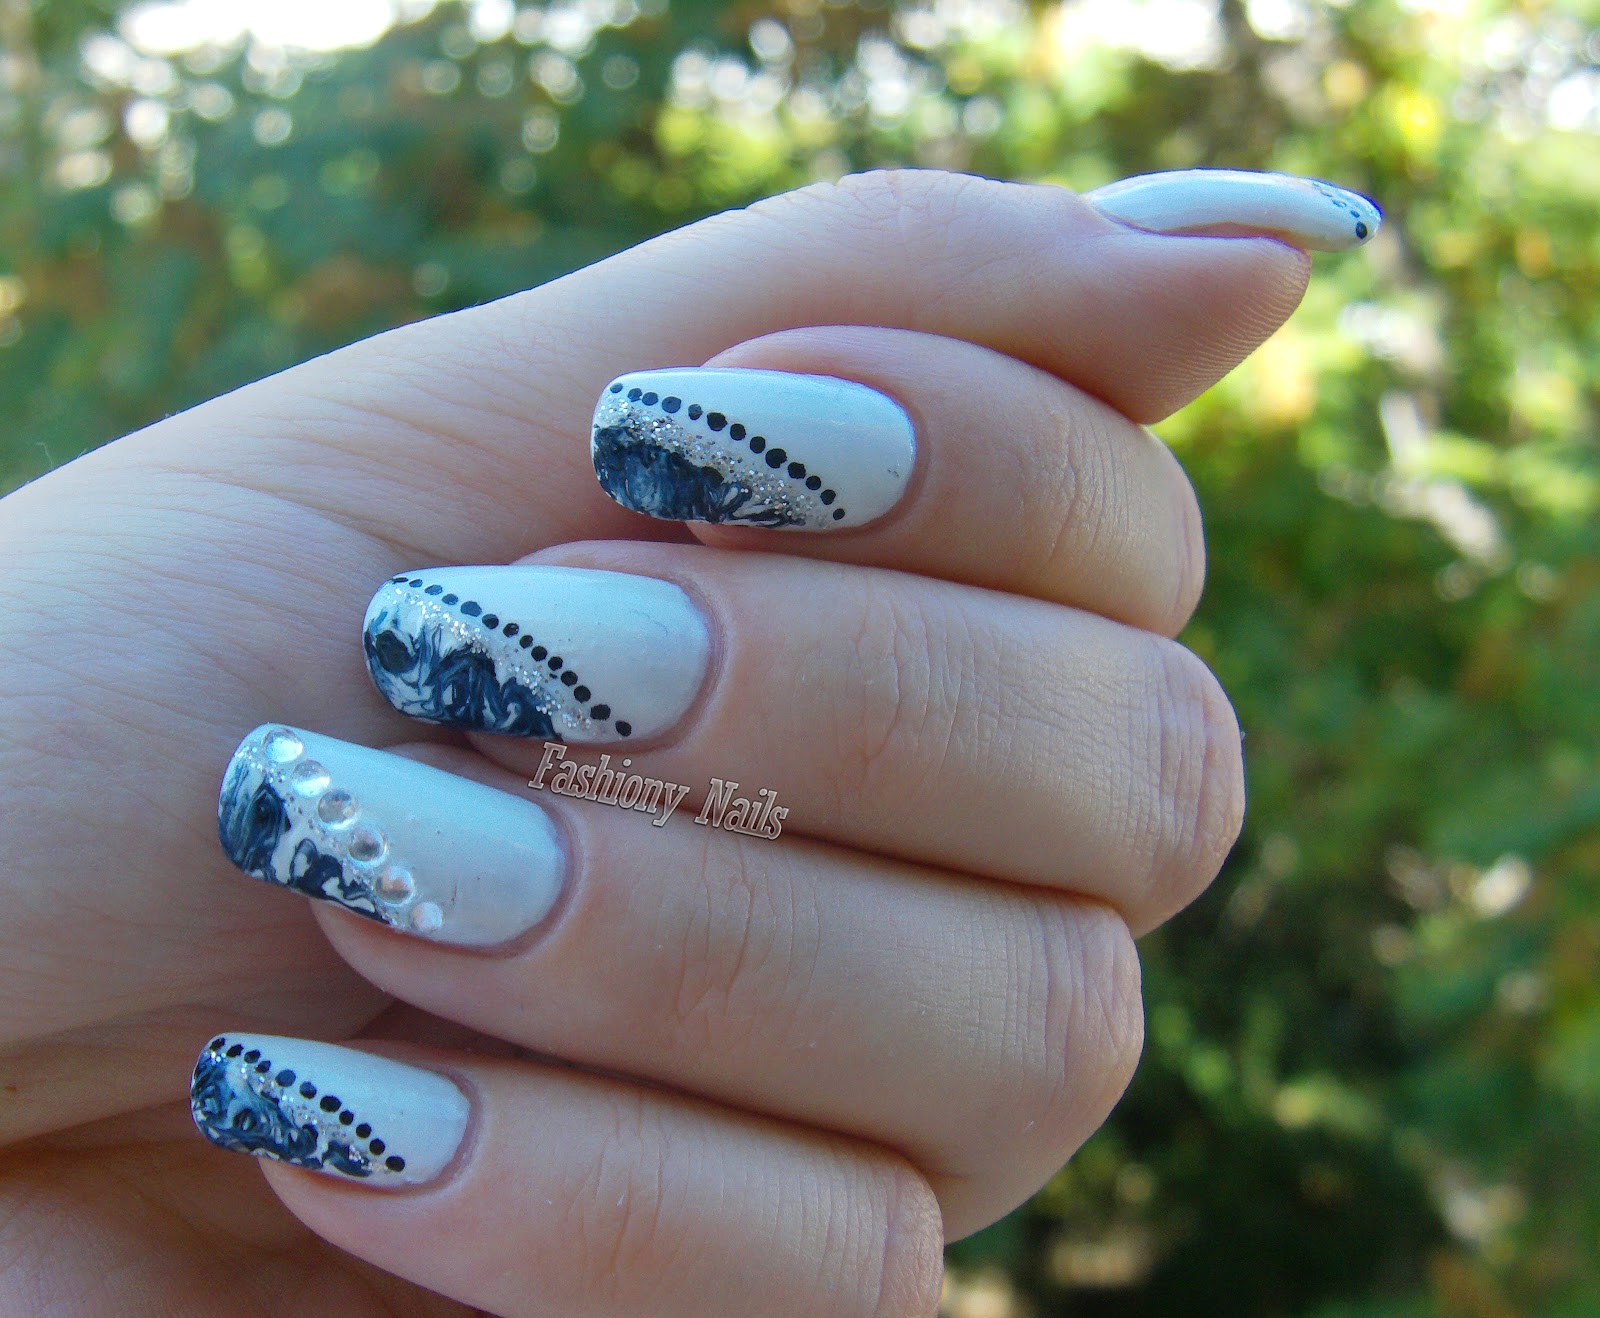
A quite long time ago I saw a picture of nail art I really liked(sorry don't remember where or who's) and I decided to make something similar,so here's my NOTW(nails of the week) :D


Now the tutorial part :) 


What you need:

  • Milky nail polish
  • White polish
  • Black striper polish
  • Silver glitter striper polishes
  • Top & base coat
Steps:
  1. First you need to create french manicure.I prefer to use as background for my french manicure a milky polish and then on top make the tips with white but you can go with plane nail as background too :)
  2. Depending on how big your tip is, make 1-4 black stipes on one side of your tip
  3. Now with silver striper go between the black stripes and create silver ones
  4. With black striper create the wavy line starting from the other side of your tip (just like you see on the picture) and with silver,create one more just next to the black one
  5. Final step,on your ring and pointing fingers make few dots along the wavy line
  6. Add your top coat and your done :D
  7. Enjoy your nails XD
~Anne~


April 26, 2012

OPI Bring on the Bling Photos, Swatches

Ok I must say that I adore this glitter polish.It came out with a collection 2010
 *Direct sunlight*
OPI Bring on the Bling Swatches
*Indoors*
OPI Bring on the Bling Swatches
*Closeup*
OPI Bring on the Bling Swatches close up

As you see this is beautiful nail polish that can be used on top of other polishes but also looks absolutely stunning on it's own.You can make it even more opaque if you apply 2 coats,I only applied 2 and I didn't use top coat.
Unfortunately I can't say if it's long lasting or not because I didn't leave it on my nail for more that 1 day as I am a big fan of nail art and change it quite regularely.For that 1 day it held pretty good even without top coat!
So what do you think of it?Do you have it? Do you like it?...I love it!!


April 21, 2012

OPI Rising Star Photos, Swatches

I bought the Girls Love Gold set from Sephora which included one cosmetic bag and two OPI nail polishes
Here are the swatches for Rising Star
*Indoors (no flash)*
OPI Rising Star swatches
*Direct sunlight*
OPI Rising Star swatches
*Close up*
OPI Rising Star swatches close up
This is a really pretty orangey gold,copper color.It has a mettalicky finish and it's quite sparkly as you can see(I didn't use top coat)...The polish itself is pretty opaque and you can get nice coverage even with one coat with right application
And this is the cosmetic bag you get with the two OPI polishes.It's a quite small but fits the necessary.
It  has a very glossy finish and it's very sparkly which I love :P


Mini Sephora haul

Yesterday I went for a walk with my mom to get some fresh air.We went to Sephora and couple other stores....So as I walked through the door of Sephora I looked on the right side and what I saw?OPI nail polishes on sale from 13.90 euros down to 8.90 euros...
Just to let my Greek readers know Sephora and Hondos Center have 25% off on beauty products so go and check them out,you can find some pretty good deals.What I noticed is that Sephora does slighty better offers than Hondos Center does...
Unfortunately the shades that were on sale are from old collections,the newest ones were at 13.90...I bought the Girls Love Gold gift bag,which had a small make up bag and 2 OPI nail polishes in Rising Star and Bring on the Bling.Also I bought the Lancome Hypnose Drama Mascara and got the sample of Lancome's Teint Idole Ultra 24H foundation


Normally I would pay 30 euros for the OPI set and 33.10 euros for the Lancome Hypnose Drama mascara but instead I paid for both of them 33.10 euros,great deal right?
I want to try that Lancome's 24H foundation although I highly doubt I would buy that one over the MUFE(Make up for ever) HD since Lancome's cost 43euros while MUFE's 33,we'll see.
In my later posts I will post the review for the Hypnose and swatches of OPI nail polishes :),so keep checking back or even better follow the blog so you will be notified.

NOTE to Greek Girls:Go and Check out your local Sephora cuz I think they might have that offer for the OPI nail polishes as well as they try to sell all the shades from previous collections :)

Photobucket
FacebookTwitterRSSHelloCottonPinterest